Building your own custom computer with the MiST FPGA board (part 1)

I’m still a noob when it comes to understanding the FPGA stuff. But I’m eager to learn an recently I’ve discovered the nice page of Grant Searle.
He takes the time to explain on how to build your own custom computer.
I thought it would be a nice challenge to get that running on my MiST. I’ve altered all sources of the module altsyncram to fit to the Cyclone III used in the MiST. Since the MiST is big enough I’ve used the following options without using sram:

  • CPU: Z80
  • ROM: Z80_BASIC_ROM
  • Program RAM: InternalRam4K
  • Interfaces: SBCTextDisplayRGB
  • Chip select: 4K internal RAM

I’ve connected the internal 27MHz clock of the MiST directly to the clock of this example. I knew that the example board is clocked with 50MHz but I wanted to see if it makes any difference. I’m still experimenting with this why not try it? 😉
I found in the minimig sources that the MiST uses there only two RGB output pins and that the pins 0-1 and 4-5 are unused. So I tried the same with the multicomp example:

Now the exciting part when starting the example the first time on the MiST. Unfortunately not much happened. The monitor didn’t show anything and went into sleep mode soon. So what is wrong?
I supposed that the monitor was driven by the wrong clock. Since the example board was driven by 50MHz it could be that the rest of the code is based on that.
I’ve used the Altera Megafunctions to create a module altpll with 27Mhz as input clock and 50MHz as output (c0). To enable that for the multicomp I’ve added the following code before the cpu entity:

Heureka! The boot prompt was visible and the cursor flashes so retro. 🙂
Still the screen was a little off and IIRC the monitor showed a refresh rate of 59MHz. In another attemped I changed the clk0_multiply_by of the alltpll from 50 to 60 and voila the screen looked really nice.

The next step will be to somehow connect the keyboard via SPI. The MiST uses SPI to talk to its IO ports like joysticks, keyboards, usb, etc. The example uses PS2 and I have to find a way to bring that together. For a regular vhdl developer this will be an easy task but for me it will be an adventure. 🙂

The current source code of this project can be found in my github repo.
(Click here for part 2)

PACE: compiling the frogger core for the MiST

Finally I found some time to do something with the MiST. Since I need something for starters I had a look at the PACE framework. It has build files for a lot of arcade cores and several targets like the MiST or the de1/2 boards. I just tried using an existing MiST Quartus II project file (pacman) and adapt it for frogger. The same goes for the project_pkg.vhd file. To generate the right clocks for the MiST I’ve used the existing pllclk_ez.* files.
After successful compilation of the core I was surprised that the core worked without problems on the MiST. Okay the gameplay was horizontal and it had no sound but from what I understand this is the current status for all frogger cores and nothing I did wrong 🙂
Later on I found the interesting web log of retroramblings.net and there an article about building a core from the pace archive. It gave me a little bit more insight about what I have done 😉
With the help of the article I’ve created new pllclk_ez.* files and adapted the project_pkg.vhd file accordingly. Voila …

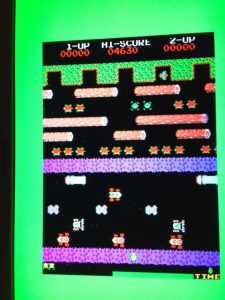
frogger1

frogger2

Source files: https://github.com/wsoltys/pacedev/commit/d1d7df38f9aaa3bc46ba148c46e8962a6e3fa889
Core file: https://github.com/wsoltys/mist-board/tree/master/bin/cores/arcade/frogger

Update:
Does anyone have the pace framework documentation? I really would like to learn more about it but you can only download it from their forums as registered member. I’ve tried to contact them via the forum but no contact yet.

Compiling the minimig core for the MIST fpga board on windows

Compiling the Atari ST core for the MIST is pretty straight forward like described here. For the minimig core some prerequisites are needed which I’ll describe below.
The amiga_boot.v file is missing and needs to be compiled before using the Altera Web Edition to compile the core.
I was lazy and took the mingw build environment used for XBMC (https://github.com/xbmc/xbmc/tree/master/project/BuildDependencies). I used it to compile vasm which is needed to compile amiga_boot.

  1. Get the sources from here: http://sun.hasenbraten.de/vasm
  2. Unzip it to vasm
  3. Go into vasm and type
    make CPU=m68k SYNTAX=mot

I copied the binary vasm68k_mot.exe to a bin directory in the mingw env. Since the xxd binary was missing as well I download the msys-vim package from sourceforge and installed it in the mingw env as well.
When I got some time I’ll create a stripped down mingw/msys env with the binaries needed to compile the firmware and amiga_boot.
Once done we need python for windows in path. With some smaller changes to the python scripts and the makefile I was able to compile the amiga_boot files. Once finished I’ll submit the changes to the MIST main repo.
Meanwhile you can use the files from here: https://github.com/wsoltys/mist-board/tree/master/cores/minimig/fw/amiga_boot/bin

Copy those files to the same directory structure of the MIST main repo clone and open minimig_mist.qpf with the Altera Web Edition. In the Web Edition you need to enable talkback in order to use the Signaltap which is needed to compile the minimig core.

  1. Go to Options
  2. Internet Connectivity
  3. Talkback options and enable them

Now you can start the compilation and after some minutes its done 🙂

Installing mist.inf on Windows 8.X

When trying to install the usb driver for the MIST on Windows 8.X you get the error that the driver isn’t signed and therefore you can’t install it. It doesn’t matter if you try it by either right click on the inf file and choosing “install” or if you try “update driver” in the device manager.

The only possibility to install it is to disable the driver signature enforcement. How this can be done is described here: http://10rem.net/blog/2013/01/07/installing-unsigned-drivers-on-windows-8-64-bit-or-how-to-get-stm-st-link-working
In short:

  1. start an admin console
  2. type shutdown /r /o
    /r for reboot
    /o for the advanced boot options
  3. before windows starts again it prompts you for what kind of action you want to take. Choose Troubleshoot -> Advanced options -> Startup settings.
  4. press restart.
  5. Once it reboots you get a startup menu with different options. From that pick the “Disable driver signature enforcement” option

Now you can install the driver but you’re still prompted if you really wanna install it when its not signed. You’ve been warned 🙂